Starting the Summer

I’m done all my exams, and have now officially completed 4 years total of university. Does that mean I am graduated? Hah! Uh, no, not quite. I’ve got a few more victory laps to complete. It’s been a pretty sweet time though, I’ve had some courses more specific to my program that are giving me a glimpse into what’s coming. I’m also enjoying how my years of reading cook books, food blogs, and food mags has turned into relatively easy marks in food prep courses. Who knew that hobbies can turn into grade points and be enjoyable.

Image

So, Fred the cat and I have been chilling and game-planning our summer. On the menu are some French evening courses, an internship in July, and a flight back to BC for a yet-to-be-determined portion of August. A deck garden is in the works, with basil gasping up water on the windowsill while it waits to be transported to a proper pot. We’ve been waking up early to walk around the park like your perfectly-normal-average 20-something. I’ve been synthesizing as much vitamin D as my euro-skin will allow without burning. I’ve yet to find a solution to swollen feet that accompany this unfamiliar humid heat, so if anyone has any tips on that, that’s a thing. We’ve been frequenting the parks and wishing there was a lake that was swim-able nearby.

But mostly we’ve just been killing time until the next season of Arrested Development comes out. So stay tuned for some weather-appropriate recipes, as well as some allergy-friendly creations, and don’t report us missing on May 26th.

Pour-Over Soup

There are a few simple things that are just so easy and glorious, I wonder why I don’t make them more often. Scrambled eggs made properly with a big knob of butter, green beans quickly blistered in a pan with toasted almonds, almond butter dipping sauce, plain boiled beets with sour cream and dill, cold smoked salmon sprinkled with lemon juice and capers…preparations that require a few ingredients but just have that taste you can’t forget.

There is one thing that is simple and easy, but now I make it all the time. Pour-over soups are quick, hearty, filling, and so easy if you can keep a few things on hand. It does require fresh ingredients, so it’s not something that you can pull out of the pantry, but it’s doesn’t take too much. There are many variations that follow a similar pattern, and it can always be adjusted to what you have at the time. You don’t have to get stuck in an only-Asian rut either: great South American versions, mimicking soups like “Pozole” follow this same method.

First of all, what is a pour-over soup? There might be fancier culinary word to describe this, but hey, I call it pour-over soup because that is pretty much what you do. It’s a starchy noodle arranged in a bowl with shredded meat, raw thinly sliced beef, or seafood, with flavourful hot broth poured over it and some fresh, crunchy flavourful things arranged on the top. The most well known variant of this preparation is probably the Vietnamese “Pho” soup. If you have broth and some leftover shredded meat on hand, this dish comes together in the length of time it takes to get the broth hot.

IMG_0957

This meal is very satisfying and nourishing too- it’s compatible with gluten free eating (if you check the ingredients of optional sauces) and The Perfect Health diet, which is a great set of recommendations for avoiding potentially problematic foods and meeting nutrient requirements. The broth has loads of nutrients, as I’ve mentioned before, and all these simple, fresh, homemade ingredients are easy on the taste buds as well as your body.

Important Components

There are a few main components that contribute to a balanced pour-over soup:

Broth. Pour-over soups are broth based, so the one place where you don’t want to skimp is using a flavourful broth. I generally use my chicken foot bone broth combined with some soaking liquid from dried mushrooms. Beef broth, which I tend not to always have on hand, is my favourite for this kind of soup. Again, if you absolutely don’t have any broth, some mushroom soaking liquid is suitable. You can flavor it with some miso stirred in at the end.

Broth Flavoring Agents. Some chunks of ginger, bashed lemongrass, star anise, cinnamon sticks, peppercorns, toasted cumin seeds…. I put plain broth that I always have in the freezer or fridge, and then flavor it on the stovetop with some whole spices. This is your chance to impart your family’s favourite ingredients. Sometimes I go simple with just star anise and black pepper, other times it’s fun to layer flavours and try different combinations out. You can also finish with various sauces based on your preference- oyster, hoisin, fish, and soy sauce often find their way into our bowls, as well as some garlic chili hot sauce. Experiment to see what preferences you have.

Noodles. I always go the gluten-free and more traditional route of rice noodles or sweet potato noodles. Sweet potato noodles are lovely and slurpy, they can be found in most Chinese grocery stores and are made only of sweet potato starch. Rice noodles are super quick, taking only minutes to prepare, and can be found at almost every grocery and corner store.

Protein. Shredded beef, pork or chicken. Thinly sliced raw beef, cooked sliced chicken or pork, some cooked seafood. A scrambled egg, or whole egg yolk, stirred in. Whatevah you and your fridge want.

Fresh, Crunchy Ingredients. This is where this soup stops being a pantry soup- big fresh bean sprouts, thinly slices radishes, perhaps jicama, raw cabbage- these fresh ingredients will bring texture to the soup and bring it right up to everyone’s par. Taking a julienne peeler to some zucchini and carrot will bring some nice bright colour.

Finishing Flavoring Agents. Fresh mint, Thai basil, cilantro, lime wedges, green onion- the perfect final touches. Something acidic, like lime, I find is key for this soup- you really miss it if it’s not there. If you like some spice, thinly cut chilies are one of my favourite parts. If you tolerate soy, some nice fermented miso adds a salty finish. Otherwise, salt generously with your favourite salt.

That’s about it- there is no particular special equipment or technique, just some really great tasting ingredients coming together in a bowl. You really can’t go too wrong.

Sometimes, it's all found in what you put on the top.

Sometimes, it’s all found in what you put on the top.

Step-by-Step

First of all you need to make sure you have your broth together. If I know I want this soup later with shredded meat, and don’t have any broth on hand, I often throw a tough cut of beef, preferably with a bone in it, in the slow cooker with a handful of dried mushrooms. Just letting that slowly cook all day will mean some nice shredded meat and a flavourful liquid you can drain off and use as broth (if I have a few chicken feet on hand, I’ll throw them in there too). If you have some broth, just throw that in a pot to heat up when you get home. If it’s plain broth, a few pieces of ginger and a star anise segment are usually what I add to infuse with flavor as it slowly heats.

While that’s heating, wash and prepare your fresh ingredients. You can arrange them in a bowl or on a plate so your guests or family can add whatever they want. I usually like bean sprouts, a bit of shredded green cabbage, and thinly sliced radishes. The lime wedges, fresh herbs, and chilies are should be arranged alongside so they can all be added as wanted.

The noodles only take a few minutes to cook, and can be cooked in the broth or separately, with the broth poured over. Rice noodles I find are a bit gummy when they cook, so I like to cook them separately and rinse them, then arrange them in the bottom of the bowl. If you have rice noodles already cooked in your fridge that makes this even quicker to make. Sweet potato noodles get really lush when they are cooked in flavourful liquid, so I really like to cook them in the broth. If you are looking for a lower carb option and eating bean sprouts, sometimes I just arrange bean sprouts on the bottom in place of noodles- still flavourful and crunchy, though you probably want larger portions for satiety.

If you are planning on using seafood as your protein, you are going to want to add that to the broth and cook it in the broth to make sure it’s cooked through. Prepare according to the recommended time based on what kind of seafood you are using. For high quality beef, such as a steak cut, you can thinly slice the beef and arrange it in the bowl raw, to be cooked when the broth is poured over. For this method, make sure the broth is boiling so it will cook enough. For shredded meat, you can arrange it in the bottom of the bowl- this is what we have more frequently as they tend to be tougher, cheaper cuts, and I also have shredded meat in my fridge quite often. For chicken, it will need to be cooked first, then added to the bottom. This is a great opportunity to use leftovers- slice up a pork chop, chicken thigh/breast, or anything else left in the fridge.

It’s time to salt the broth- with miso, sauces (like mentioned above), or sea salt. I prefer to arrange hoisin, soy, and chili sauce on the table so people can add their own. Now that you have a plate of fresh ingredients, some noodles and protein in the bowl, and some piping hot liquid, you do what the name says- pour the broth over. That’s it, time to serve.

Packed lunch gets pretty darn lush.

Packed lunch gets pretty darn lush.

Pour-Over Pho Inspired Soup

1 L of stock will serve dinner sized portions of about 500 mL per person, or side portions of 250 mL for 4 people. There are very few exact amounts- it’s meant to be looked at logically for how many people you have and about how much they are going to eat. It’s great to have leftovers for lunch the next day, so don’t worry if you make too much, just store the fresh and liquid/noodles/meat separately.

1 L of stock or flavoured cooking liquid

1 star anise, whole

1 Tbsp peppercorns, whole

1 inch piece of ginger, sliced


Leftover shredded beef

Rice Noodles, cooked

Handful of bean sprouts

4 sliced radishes

Cilantro, Thai Basil, and Mint, thoroughly washed and plucked from stems

Raw green cabbage, thinly sliced

½ lime per person, cut into 2 wedges

Green onions, sliced


1-3 Tbsp miso, to taste

2 tsp fish sauce

Hoisin Sauce

Soy Sauce

Chili sauce (like Sriracha)


Follow the directions above.

Plus, I mean, it's quite a pretty soup all around.

Plus, I mean, it’s quite a pretty soup all around.


Wham, Bam, Thank you Yam.

Just in case you were like “how is this person still blogging about freaking soup?”, I decided to include a super-quick bonus recipe. This is my quickest go-to lunch recipe. Great for when you are hungover stayed up late studying and forgot to plan ahead.

It’s a recipe for yams. If you are feeling zany, mix it up and use any root veg you’d like to.

IMG_0369

“Who Ate All The Leftovers, It’s 7 am and I Need to Leave for the Bus in 20 mn” Yam Ginger Soup

1 can of coconut milk

1 medium sized yam (1-1 ½ cups grated)

1-2 Tbsp fresh ginger, grated

Sprinkle of turmeric, or other spices of your choice

Salt to taste

1) Put the kettle on for coffee, it’s early, c’mon.

2) Put can of coconut milk on medium-high heat.

3) Grate yam and ginger. Place in coconut milk that has been warming up whilst you grate.

4) Put the lid on, a little off kilter so some steam can escape, and let it simmer over medium heat until everything is tender and falling apart. Approximately the length of time it takes to shower (15-20 mn). If you are really feeling ambitious, this is where you can also knock out some quick exercises- a good morning flail-about to get the blood pumping.

5) Take the whole lot, puree it. Add water as needed. Throw it in a thermos, or in a nice glass container with a well sealed lid to heat it up in later.

6) Congratulate yourself on getting calories and starch and vitamins and healthy fats in such a short time period, and not spending more money at that weird cafeteria on campus.

Plenty of Puree

Pureed soups have very few components, so the flavor benefits from being kept clean and simple. They can be pretty darn elegant and quick, freeze well, and heat up easily. A little bit more equipment is required (ie one more piece than just a pot), but it’s worth it. Eating pureed soups can be a relatively sneaky way to add a whole lot of veggies into a meal, and are a great way to highlight single vegetables that normally are relegated to the background of dishes. I generally treat them as a side dish or a light meal, depending on the heft and accompaniments. My “uhhh we have no fresh produce or leftovers” lunch is grating a yam and some fresh ginger into a can of coconut milk, cooking it while I’m in the shower, then pureeing it and throwing it in a thermos- it doesn’t have to be complicated.

 Equipment

 Probably the best texture for purees is created by a food mill- I’m going to go ahead and assume that you, like me, do not have a food mill. You may also not have a food processor- that is okay as well, because food processors are going to do a better job of chopping everything into little bits rather than producing a velvety texture. Which leaves us with blenders.

There’s the standard glass or plastic blenders- I operated for several years primarily off a magic bullet, and they work well with a bit of stopping and shaking (for all those college students, who always seem to have these suckers). For a glass blender, in case it isn’t obvious, do NOT put piping, bubbling hot liquids in to puree. Just don’t do that. Nobody needs exploding glass in their kitchens from an invisible little crack that was generated years before when it was bonked too hard in the sink. Let it cool a little (it can still be quite hot, just not super freaking hot), do it in batches, you should be fine- open that little vent on the top (it’s so steam doesn’t blow the lid off/build up pressure and cover you in hot liquid) and hold the lid down with a tea towel.

If your pretty serious about blending, however, and you want to make a very reasonably priced investment to ensure less dishes and more pureeing in your future, go for an immersion blender. They are easy to store, cheap, and oh em gee so much quicker than scooping liquid into a blender, then pouring it back in and blah blah blah. Seriously, I only got one recently, and that thing is amazing. I will say though, I find I have to cook the veggies to a softer point when I am blending with the immersion blender than the regular blender to get the same smooth texture- so keep that in mind.

Another useful piece of equipment for this is a strainer– just a quick run through can catch all the bits that you’ve missed. Cheesecloth will catch finer pieces; so if you’re feeling really sharp, line the strainer with some cheesecloth.

 Important Components

 Now you’ve got your equipment set and you are ready to go, so here are the components you are going to want to worry about when it comes to a pureed soup:

 Liquid base. This is the broth, stock, coconut milk, water, and is usually flavoured with any aromatics involved in the soup, like onion, fresh ginger, leeks, spices or garlic.

 Starch. The thickener of the soup, this is what gives the velvety texture and makes the soup more filling.

Stars of the show. I am going to make an assertion here, and not everyone may agree with me, but I think that a pureed soup should only have two main flavours. Most classics seem to operate on this theory, so I don’t think I’m alone here (carrot-ginger, potato-leek, cauliflower-curry). More than that, and you are going to muddle the show.

Garnish. Could be as simple as some coarse salt and pepper, a few shaving of hard cheese, a couple of walnuts, some chives, a drizzle of oil, hit of citrus, crisp bacon…you get the idea. Sometime that brings focus, usually a bit of texture, and some pop.

One thing that could be argued onto that list would be a bit of finishing cream. Usually added in a stream while blending, a few tablespoons of heavy cream can go a really long way to creating that perfect blended mouth feel. There are some soups where I always do this- mostly potato or cauliflower based ones- but I don’t think it’s absolutely essential. It’s always there as an option, but these recipes are going to be dairy free in general. The heavy cream can always be employed for a special occasion.

Texture Optimization

The largest variation in pureed soup is going to be the thickness. I’m going to be really annoying here and not give you a perfect thickness to aim for- because this is one of those things that fall into the personal preference categories. I’ve seen 4:1 and 3:1 ratios for liquid to veggies- but this all depends on what the veggie is and the starch content. I can make a pureed soup on Monday with a bag of carrots and 5 cups of water that is the perfect texture (in my opinion), and then buy a different bag on Wednesday that will need 7 cups of water to have the same effect. The best thing to do- be casual and err on the side of thicker. You can always add more liquid, but re-thickening a soup is a huge pain. Add enough liquid to cover the veggies, add more if you can’t blend it easily, and then adjust it at the end- you’ll get the hang of it pretty quickly, the only thing you can do is try.

One more thing until we combine this technique with a “recipe”- this is non-intuitive to me, and I thought it was pretty silly until I did some side-by-side comparison. Don’t cook the veggies to complete mush. They should be tender, easy to pierce with a fork but not spontaneously dissociating in the water. Why, you might say, I’m about 5 s away from giving them the ultimate mush in the blender. This brings us back to the starch content in vegetables- starch changes and gelatinizes as it is heated. We can talk about the loss of birefringence and amylose leaching, or you can just trust that things happen, and overcooked vegetables have a different structure than vegetables cooked until tender. Your puree will have a better texture and will taste better if you cook the vegetables just to tenderness. You will have the added bonus of having bright green coloured purees for green vegetables, versus their browned, overcooked counterparts.

Another thing that might seem a little obvious, but I know I’ve tried to test the limits of, is to puree this mixture while it is still hot. This, again, ties back to starch. When you cool starches you get something called retrogradation going on, which is basically the thickening and “tightening” of starch. Think of rice that is cooked perfectly tender when it is warm- cool it down and, depending on the kind of rice (parboiled is particularly bad for this due to amylopectin content), you are going to have a chewy, tough grain. So, if I take some tenderly cooked carrots, chill them, and then puree them, I’m going to have fine bits of tough granules that won’t break down with a blender. You have to reheat them to get the smooth texture desired.

Step-by-Step

I’m going to go through the technique to make a pureed soup in a step by step manner, without using any specific amount. This will give you a better idea about how to wing this whole pureed soup thing. Afterwards I’ll include the specific amounts I used.

First, figure out what you want to make. I was going to do the carrot-ginger, but you know, it’s been done. I happened to have a lot of bacon and really rich duck stock (could also have used beef, turkey, chicken, or mushroom soaking water) in the freezer, so I decided to go ultra savory on the sweet ol’ carrots, and make a smoky carrot soup. There are two stars of the show- carrots (sweet, fresh, bright) and smoky (dark, deep, medicinal). The carrots can also act as the starch because they’ve got enough going on to hold a good texture- it’s a little thinner than a potato or yam soup, which isn’t better or worse, just different.

Image

Next is to start making the liquid base. My goal with this was to build some layers of flavor into the smoke. Caramelized onions, duck stock, whole garlic cloves, and smoked paprika I thought could be combined to make up the smoky flavor. So, I started caramelizing the onions by cooking them at a low heat and stirring only occasionally over 20 mn. In the meantime, I chopped up some carrots and peeled the garlic.

Image

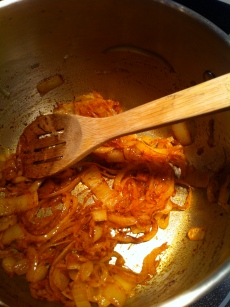
When they were starting to stick too much and had developed a brown colour, I hit the pot with some water, and stirred rapidly to detach the onions from the bottom. I was using water because the duck stock I had made was really concentrated and frozen in a muffin tin- I did equal parts stock and water to dilute the stock. I added the carrots, garlic, a couple teaspoons of smoked paprika, and my frozen stock cubes.

Image

I threw the lid on, at an angle, and left it to gently simmer until the carrots were tender to pierce with a fork.

I used my immersion blender to blend the mixture until smooth. I added a bit of water until it was the texture I wanted. A generous sprinkle of salt and another teaspoon of smoked paprika brought the flavor together. I ladled enough for the two of us into bowls, and refrigerated the rest for lunch.

Now for the garnish- if I was going with smoky, might as well take it all the way home. I reheated a few slices of bacon I had already cooked, and crumbled them over top of each bowl (I call bacon bits “magic pork dust”- most accurate description, I think). A crack of coarse black pepper, and it’s done- a nice smooth soup with plenty of flavor for something so simple.

Image


Smoky Carrot Soup

1 lb fresh carrots, peeled and chopped

1 Tbsp butter or bacon fat

1 onion

1 head of garlic

1-4 tsp smoked paprika

1 L stock, stock and water, or stock and mushroom soaking liquid

Salt, to taste

Extra water to thin

Bacon, cooked and crumbled

Fresh black pepper


Follow the instructions above.

Soup (er)

So, I’ve done like a zillion broth recipes on this blog now (here, here, and here). Mostly because one can never have too much broth, and broth is a staple for lots of amazing recipes. The most obvious type of recipe being soup.

The start of many classic soups is a mirepoix.

The start of many classic soups is a mirepoix.

Soups are a staple of many kitchens, and though they seem simple there are lots of places where people go wrong. They are fickle beasts, going from a bowl of warm comfort to bland “meh” in only a few steps away. Soups shouldn’t taste like they’ve been boiling in a pot for hours, and they should have more than one flavour note. They shouldn’t be “in between”- bold or simple, smooth or chunky…. none of this halfway business, or it will start to taste or feel like an incomplete attempt. Pick what you want out of your soup and go with it.

Layers, bb.

Layers, bb.

There are some basic essentials, that are important across the board:

Broth. The right broth makes all the difference- it is the basis for all soups, and makes all the difference. You can tell just by the smell when soups are made with store bought broth- they just don’t have any depth, they don’t coat your mouth because of a lack of gelatin, and they are essentially void of nutrients. If you don’t have any broth on hand, I recommend at least using an old vegetarian trick and using the soaking liquid from dried mushrooms (simple- dried mushrooms, cover in boiling water for 20 minutes, drain liquid and use) and caramelizing some onions in place of beef broth. Also, for certain vegetable or pureed soups the cooking liquid may be all that is required- keep that in mind when you are needing something quick.

Broth- tired of hearing how much it's a staple yet?

Broth- tired of hearing how much it’s a staple yet?


Texture. Velvety, crunchy, tender, and pebbled are all textures. Whatever one you are going with, you want to go all the way with. Little chunks doesn’t equal velvety, and wilted doesn’t equal crunchy. The mouth feel goes a long way in the initial impression, and is especially important to the more picky eaters among us. Commit to a texture and go with it.

Sometimes, it's all found in what you put on the top.

Sometimes, it’s all found in what you put on the top.

Acid. So many soups would benefit from a shot of something acidic to make the flavours pop. Fresh lime or lemon squeezed over at the end, a bit of vinegar, splash of wine- something to bring everything together. Without acid many soups fall flat.

Salt. Add enough! Seriously, nothing worse than a bland soup. Acid can change the perception of salt, so don’t finish salting until you add the acid.

Over the next couple of weeks I’m going to cover the pureed soup, the pour-over, and the stew. Hopefully it will be enough to get you through this cold (freaking cold, wtf mother nature, -26 is not cool) winter weather!

I feel like I should also take the opportunity emphasize this point again and again: most of what I am putting out there is way more technique than recipe. There are literally millions of recipes at your fingertips at this moment- I don’t want to out myself, but all the formulations of food I will ever have on this blog have been done before, in some kitchen, somewhere in the world.  Shhh! Other bloggers and food writers know that the same is true for them- it’s like porn, if the thought even occurs to you; it is on the internet somewhere.  The only things I can give you that may be useful, in my opinion, is the memory of techniques that you can turn into your own thing. I don’t know what your taste is like, how salty you like your food, how spicy, how strong- that is up for you to taste and adjust for. I know your pantry is probably not perfectly stocked, and you might have this, but not that, and you have a handful of this to use up…that’s just reality. For people that make most of their own meals, a majority of the time you are going from memory, technique, or necessity, not a recipe. That is usually the ultimate goal- the flexibility to make something with what you have, and to do that you may have to read recipes and extract useful techniques or idea. So hopefully this helps- I try and provide enough explanation and background to facilitate that process, and the actual amounts are given as mere suggestions. So, keep this in mind for the upcoming soup “recipes”.

And remember: when you have nothing else in common but snow peas and not talking, there’s always soup.


Something Responsible.

So, as millions of other people across Canada can relate to, I have been waiting for a doctor’s appointment. We all know the drill- show up at an office with your life in shambles streaming incoherent sentences out of your blubbering face, have an encounter with a medical professional of some sort, get a slip of paper, and enroll in a strange religion which involves praying for cancellations of other people who probably need that appointment just as much as you do. I ran through that drill last September, and this week I got the appointment I waited so much for.

 Appointments are great things, and specialists can work all kinds of wonders. As much as I believe that your health is your business, and to that extent something you should have power over, no matter how perfectly your symptoms match webmd it’s always a good idea to eliminate the possibility that it is something else before you go around fixing the symptoms on your own. So I am grateful for my appointment, and grateful for the many wonderful doctors (who trump the bad doctors, even though the bad doctors are hard to forget) who have helped me throughout the years. No matter how many suspicions people have of conventional medicine, there is no chiropractor in the world I would have wanted to do my heart surgeries (unless she/he doubled up as a cardiologist).

 That being said, I’ve noticed that I’ve been leaning on this future appointment as a crutch in the last four months. Because I was stuck with not knowing exactly what’s going on, I carried on like getting a diagnosis was going to give me magical insight on what to do. That was wishful thinking- even if I showed up at the door and left with a slip of paper that said “you have endometriosis, don’t worry, it’s not in your head and you aren’t going crazy and making all this shit up even though you sometimes wonder because it gets so bad you start to question every feeling you have”, besides having a lot of validation, what was I going to get out of it? I know that no matter what I have, getting plenty of sleep is good for me. Eating nutritious food, avoiding foods that I know cause inflammation, that is good for me. Moving when I can and avoiding sitting for any length of time at all costs (death to my pelvis, whoever invented the chair did not have endo) is good for me. Paying attention to my body, recording triggers, getting a baseline, that is good for me.

 The one thing I did line up for myself is going part time for school. That saved my sanity and gave me the wiggle room I needed to take some stress off my body. It allowed me to start volunteering with an organization I love, read more books related to my health, pick up hobbies, take a yoga class, and cook food from scratch. Sure, sometimes I watched Game of Thrones marathons and wondered what had become of my life- but I needed the chance to do that. To just chill out and spend a few hours wrapped in a heating pad drinking tea. I’ve always packed my schedule, which I appreciate because I still believe that the more you do the more you can do, but taking just one course off the table was exactly what needed to give.

 School was a pretty easy change though- it just meant ticking off one less course and finding a volunteer gig to inspire me. The other things- paying attention to my body and recording what is happening with it- is a bit harder to implement. It takes time and attention. Sometimes you just want to ignore that stuff- if I don’t face the fact that sitting all day makes it really hard to walk the next day and making my weird stiff-right-leg limp worse, then I get to continue sitting all day. That’s easy to do, even if it makes things harder in the long run.

 Even though I know a lot of things that would improve the way I feel, there are still lots of things I haven’t explored that may be very useful. I’ve had a really hard time getting good information on endometriosis- a lot of the advice out there lumps poly cystic ovarian syndrome (PCOS) in with endo, even though they are very different. Most of the medical interventions are pretty heavy-duty hormonal drugs and most of the alternative interventions are poorly studied. Though it would be completely anecdotal, I would like to try out a few promising management tools or interventions to see if they have any affect on my pain- who knows, other folks may find it useful too.

 So there’s going to be a bit more blogging about me and my lifestyle going on- for accountability and community I suppose. It just seems like a good idea to have other people on board and reading, especially if they have tried any of these things or have any advice for me. I need to take a bit more responsibility for my health, to give myself some room to heal, or even room to drink a bottle of wine and stay up half the night every once in a while (because hey, I’m still barely in my 20’s, I should be able to do irresponsible things without being crippled).


My appointment did go really well- had a wonderfully respectful gynecologist with a very adorably novice overly-serious medical student. I am waiting for a laparoscopy because I decided that a diagnosis is important for me. In the meantime though, it’s time to take this on.

Nose over tail over nose.

One of the things about returning to meat eating after bouts of vegetarianism (including some flirting with veganism) is that a lot of the reasons why I stopped eating meat, namely animal cruelty and amount of unused animal parts thrown away to produce boneless, skinless, plastic wrapped meat, are still 100% valid.

I still love animals, so much. I always have been and always will be a total and complete animal person. Sebas and I frequent parks during “dog hours” to go “dog watching” and both experience severe internal melting when we see cute pictures of animals. I feel deeply that the next short-as-possible while in my life will be my “pre-dog” years. We want to foster cats in the near future. I have gotten in arguments with bitchy chickens while I oggle their chicklet babies, and am respectfully in awe and terrified of swans. I find being licked by cows hilarious, and there’s no feeling quite like riding a horse. My heart broke when my two pet rats (RIP Cam and Mitchel!) passed away. It is my dream to one day have a modest piece of property crawling with critters. I even love spiders, bugs, and worms (including a certain pet hopping spider and worm named Tony from childhood). I know that animals are inquisitive, intelligent, hilarious, loving, and brilliant- I do, after all, consider myself among their ranks. We are one of the same, a fact that is often forgotten.

There are plenty of moral complexities and dilemmas connected to eating meat. I’ve touched on it in a previous post, and will continue to address it in the future. In this post, however, I am going to talk a bit about taking the sting out of meat consumption by eating the “odd bits”. The funny bits on the top shelf of the grocery store, hiding in the freezer, or behind the butchers counter. The necks and feet and tongues and organs and tails. Nose to tail eating is experiencing a resurgence as meat prices rise and the cost of eating only deboned muscle meat becomes clear. I recently learned in a food fundamentals class that “only 30% of chicken is edible” after discarding the fat, bones, and organs. That KILLS me- if I weigh a bone before and after making bone broth, it loses more than half the weight depending on the kind of bone. I gain all the nutrients from the bones, save the fat from the top, and use the organ meats to make a nutritious gravy or a whole other meal. No one in our history would even consider tossing nutrients in the garbage, so I don’t see how we view that as a rule now.

With great use of all parts of the animal, though, comes a bit of responsibility. Organs, fat, and bones are great places to deposit toxins and antibiotics accumulated over the lifetime of an animal. Sourcing high quality meats, preferably free of antibiotics and raised in healthy living conditions, becomes more important if you are going to consume a lot of these odd bits of a regular basis. The trade off is, kindly, a smaller hit to your wallet as many of these odd bits are cheaper than their pure-muscle counterparts. Beef tongue, which is amazingly tender, comes in at about 1/2 the price of any beef roasts I can find at my butcher shop. Bones and scraps, which are sometimes bundled together and frozen, can be had for very reasonable prices. The decline in popularity in organs like liver and heart have made them very affordable even at high quality.

It takes a bit of hunting on how to cook these morsels, which can be had in the forms of cookbooks and blogs. I would recommend following a recipe or technique for a lot of these bits- “winging” a liver recipe isn’t for the faint of heart. A great book that I recently received for Christmas is “Odd Bits” by Jennifer McLagan. It is 234 pages of, well, everything starting at the front and ending at the back. Beautifully photographed with everything from the familiar (buillon, pork shoulder, corned beef, and grilled liver) to the very unfamiliar (heart tartare, tripe salad, pigs foot terrine, and crispy testicles). While I haven’t tried any recipes yet, it’s been an inspiration.

Odd Bits

So, yet another broth recipe. As you can see, this is my preferred scrap-stuff-use-it-up method. This time beef broth, made from beef neck. This is an “all in the pot” recipe that can be adapted for veal and lamb. Again, I recommend keeping a “bone bag” in the freezer where you can save up scraps until you are ready to make this recipe. If you are a big broth user/drinker, I would also recommend finding a good source of bones/scraps, because you will probably go through quite a bit.

The key to beef broth is coaxing out extra savory flavour. Unlike chicken broth, a generous amount of meat still on the bone is really important. Plenty of meat, browned on the outside in a hot oven or stovetop, will create an excellent flavour and leave you lots to pull off the bone and use in a stew. A combination of onions, red wine, dried mushrooms, and star anise will boost the “beefy” flavour. The red wine will also bump the acidity, helping to draw minerals out of the bones- you just need a couple splashes of pretty cheap wine (neighbor give you some home bottled stuff? perfect). If you want to be up to your neck in umami, browning the onions then adding a spoonful of tomato paste and sauteing it until the paste is brown, should take you over the edge. I, however, am mostly lazy. I brown the beef on the bone, arrange onions on the bottom with aromatics, then pour water/wine over the whole lot.

Yet again, with broth, it’s more of a technique than a recipe. Different bones have different mineral contents, come from animals of different ages, and carry different amounts of gelatin. All of these things are not like the other. You can take a bunch of ingredients, put them in a pot, cover it in water, and see what happens. Try it- if it is too _________ or not enough __________ you can adjust it- leave a question at the bottom if you are not sure how and I will get back to you. You won’t need measuring cups- just a handful of this and a few of these.

In the photos I took, I ended up with 9 cups of completely solid beef broth because there was so much gelatin. I used beef neck, which had so much meat on them, I added a few extra star anise, shredded the meat after it was cooked, and we had steaming bowls of pho for the next two dinners. You can also use marrow bones, knuckle bones, and any other bones. When using just marrow bones (which you can get in most freezer sections), add some beef stew meat or other beef scraps, because there usually isn’t adequate meat on them- 1 lb of stew meat for every 5 lbs of marrow bones is a good ratio, I find. If you have any leftover broth (not in my household, haha), freezing the extra in silicon muffin trays is my favourite method. Broth keeps for 4-7 days in the fridge. If your broth doesn’t adequately gelatinize, you can prepare the resulting liquid with powdered gelatin following the instructions on the package (usually 1 packet for every 3 cups). The gelatin is important for the distinct mouth feel broth gives, and also has health benefits. For the dutch oven or heavy bottomed pot method, check out here. In this post I’ll only be covering the good old slow cooker method!

Enjoy this savory elixir over 2013, hope it’s a good one!

Meaty goodness in the form of neck bones.

Meaty goodness in the form of neck bones.

Beef Bone Broth

~5 lbs of meaty bones (neck, marrow, and/or knuckle– but any bones really, beef, veal, or lamb)

2 onions

1 star anise

Several bay leaves (2 large, 3 medium, or 5 small is my rule of thumb)

Spoonful of peppercorns

Handful of dried mushrooms (can be purchased cheaply in ethnic grocery stores, such as the ones found in Chinatown)

Splash of red wine (1 cup? Just slosh some in there.)

1) Cut the onions in half and separate into layers. Arrange on the bottom of your slow cooker with mushrooms and spices.

IMG_1014

2) Brown the meat on the bones either in the oven or on the stovetop. In the oven, turn on the broiler and arrange bones on lined (parchment paper or silicon) cookie sheet. Broil for several minutes until brown, remove from oven, flip with tongs, and return to oven. Broil for several more minutes. On the stovetop, heat a small amount of oil in a heavy pan. Add one bone piece at a time, browning on both sides, then removing from the pan. When browning things, as always, keep a tea towel close in case your inconveniently close fire alarm goes off.

IMG_1020

3) Arrange meat on top of onions. Splash a bit of wine up in there. Add water until everything is happily submerged. Cook on low for 12-16 hours. Strain into a glass container and chill- reserve the solids to pull the meat off and enjoy later. If you want it pretty and clear later, strain through cheesecloth on the way in.

IMG_1066

4) Pull out of fridge. Remove the fat collected on the top- if it is a nice solid colour (not scummy) reserve for cooking use later (aka “tallow” if it’s beef fat).

IMG_1069

5) Enjoy your lovely, thick beef broth! If you found yours to be thin and watery, you can use powdered gelatin and prepare it according to the manufacturers instructions.

IMG_1074


Spending time on your feet.

It’s been fair sailing up here in Montreal. It has been consistently above 0 degrees, perfect for a fall jacket in late-freaking-November. Truly excellent. The uni seems to have slightly overshot the frigidity of the outdoors, which seems pretty typical- the libraries are stuffy, hot, and I always leave sweaty with a buzzing head. All the more inspiration to take breaks and walk up the nearby Mount Royal I suppose, which I’ve been doing a lot lately. It adequately fuels my podcast addiction too, which is nice.

One study technique I’ve really taken too is finding the counters you can study at bar-stool-style, and alternating sitting and standing. I get a sore back from sitting for extended periods of time, and at home only study in my stand up “desk” aka “bookshelf with a drawer that opens and I do work on”. It’s nice to have a school option. If you want to geek out on why you’d want to try standing while doing work, Wired did an article a while ago that covers the basics, and Kamal of Pain Database wrote about the exercise-y side of standing desks (bonus, photos of standing desks in action!).

DIY with a free bookshelf thing you found in the basement of your building version.

Closing hour, highlighted with terrible book stacking skillz.

After a battle with an ear infection-cold-sinus-nonsense-combo, I have had quite a bit of studying to catch up with. This means I’ve felt a bit like I’m running on empty and my health is just out of reach. Aches seem a bit more achey, and maybe-endo symptoms have been a bit harder to keep under control. Because of this, I’ve decided to tighten a few things up around here- really keep the pantry/freezer/fridge WELL stocked so that meal preparation is that much easier, taking advantages of times that I’m feeling good and getting all the prep work done ahead of time, and adding some fortifying foods to help give me the boost I need.

One of the staples of healing for me is a nice rich broth. Broth is a staple of so many awesome recipes, and we go through an amazing amount. I like it in a cup with some spices as a savory drink, as the basis for rich stews, and as cooking liquid for rice and vegetables. I wrote about it earlier, but I thought I would share one of my favourite variations- broth made with chicken feet.

Chicken feet are one of those things you see and think- how could anyone possible eat that? But chicken feet are a reservoir of cartilage and connective tissues that turn broth into a rich, velvety texture. When you cool the both, it gels right up so thick you can cut into it like desert jello. The resulting mouth-feel is amazing, and gelatin is considered very soothing on the gut- great for when you are recovery from sickness or just trying to avoid it! One of my favourite things to have when I’m not feeling well and hardly find anything palatable, is rice cooked in both broth seasoned with seaweed flakes and a dash of soy- lots of the flavour of sushi and so easy to digest.

This is a time period away from being a lovely congee, but I like texture so keep it right here.

Chicken feet, in my experience, is available in most grocery stores where there is a wide variety of meat cuts including organ meats- I had no problem finding them in Montreal or Victoria in fairly regular grocery stores. Sometimes they’ll have them in the freezer section. Otherwise, China town will for sure be able to hook you up with chicken feet.

For this broth I stuck to my regular recipe, but added some chunks of ginger and eliminated the celery and lemon. The result was a warm ginger spike in the final product- however if you want more versatility, you can leave out the ginger and add seasonings as you use the broth.

Chicken Foot Bone Broth

1 kg (about 2 lbs) of chicken feet

2 carrots, unpeeled and roughly chopped

1 onion, roughly chopped

1 head of garlic, cloves separated, peeled if desired

1/4 c of ginger segments, roughly chopped, unpeeled

2 star anise, whole

1-3 Tbsp apple cider vinegar

Water, to cover

1) Prepare all ingredients above. Optional- roast the onion, carrot, and chicken feet in the oven under the broiler for a few minutes to get extra colour and flavour (I rarely do this because, uh, dishes mostly).

Slow Cooker Method: Place all ingredients in the slow cooker. Pour water in until everything is covered- I fill mine up all the way. Put on the “low” setting (or “1” if yours uses numbers) for 12-24 hrs. Strain out the solids and refrigerate the liquid for up to a week.

Dutch Oven/Heavy Bottomed Pot Method: Place all ingredients in your pot, and cover with water. Bring to a simmer on the stovetop, and reduce the heat to the lowest setting. You can leave it on the stovetop for 6-12 hrs, or throw it in the oven at 225 degrees F for 6-12 hrs. Check a few times to make sure it isn’t bubbling or water isn’t evaporating- add water as needed. Strain out the solids and refrigerate the liquid for up to a week.

Storage tip: If you have leftover stock, I recommend freezing it in silicon muffin cups if you have them- that way they will be in nice portions that you can easily take out and use, and the silicon will let you easily pop them out once they are frozen.

Roasty toasty.

A great, big turkey thanks.

Once again, this Thanksgiving we headed off to Ottawa. If you do it twice in a row, does that make it a tradition? Who knows, but it was really awesome. The colours were beautiful. I got to see my friends and take over a coffee shop dance floor. Running in the rain went down, as did a few episodes of “Girls”. We also saw Seb’s family friends, got our semi-annual turkey dose, and I got to stock up on a few books for the upcoming months.

Lovely leaves.

Lately, everything has been pretty ideal. I’ve been running in the morning and doing yoga in the evening.  I’ve been reading novels and meditating for realzies. I’ve been cooking a lot of good, autumn appropriate meals (I’m lookin’ at you, slow cooker). We haven’t gone out for dinner in Montreal in ages. However, all this “la-la-la things are so awesome, why am I part time again? I need to do more things!” has been kicked to the curb this week. The pain wave has hit the shore, as they say. When a walk that normally takes you 15 mn suddenly takes you 45 mn, you get pretty humbled. Perspective can start to change it’s pace. It’s just been a reminder that this is why I’m part time- because sometimes I can’t do all the things, and when I can’t I need some room to scramble back into place.

So, this year I’m thankful for some foresight. For getting it into my brain that things will blow up if you mix health in with your other priorities. For all the people who helped make that happen. For all the fun, nasty, trippy complexities that life comes with. And for the smell that comes from roasting a great, big turkey.

Making fall of the yogurt.

Now that my boots are drying by the door and my rain jacket accompanies me permanently, it is time for the year-round yogurt recipe. None of this sunny weather nonsense, I know that your place is probably as chilly as mine and you’re on the hunt for squash. We all move on. It’s fall now.

Things have been getting progressively busy around here, so there have been a lot of set-it-and-forget-it meals. I’ve been making about 2 L of chicken foot stock (recipe to come, I know you’re dying for that one) a week, several stews, and plenty of tough cuts cooked down in some punchy flavoured liquid to be re-purposed in other recipes. For these guys, my slow cooker is my best friend. I covet dutch ovens every chance I get, but my slow cooker came at a considerably cheaper price and I feel safe leaving it at home when I’m out being busy and not having to worry about the oven being on. Plus, if I forget about it (it happens) it shuts off automatically. If you are a student, slow cookers are one of the top best investments you will make- not only can they be plugged in anywhere, so they don’t take up precious stovetop/oven space, they are great bang for your buck ($30-$60 for a totally decent one). With a couple smart strategies you can make totally impressive meals for very little effort. Plus, you can make this yogurt. Bonus.

That being said, this can be done two ways: with a slow cooker or with a large heavy-bottomed pot like a dutch oven. You basically want something bulky and thick enough to hold heat for a while. Thermometer is the only other specific equipment that I would recommend, but don’t I always recommend a thermometer? So yes, have a thermometer or else use the by-touch method.

You might be able to tell, in my pictures there are vanilla specks. So yes, I stewed a couple of vanilla pods with mine for some flavour. You can do that too if you would like very-vanilla yogurt, otherwise a little extract at the end adds lovely vanilla flavour.

Year-Round Yogurt

Equipment

Slow cooker or dutch oven

Thermometer

Large old towel

Ingredients

2 L whole milk

2-3 Tbsp plain yogurt with live culture (starter)

1) Pour all of the milk into the slow cooker or dutch oven. Turn slow cooker on to the highest setting or the dutch oven on to your ovens medium setting. Heat the milk to 180 degrees F (or until steaming and frothy, but not boiling). If using the dutch oven, stir frequently.

2) Take the lid off and remove the heat source (turn off stove or slow cooker). Cool the milk to 110 degrees F (or, until you can comfortably stick a clean finger in and hold it). To speed this up, take the lid off.

3) Add the starter culture and mix thoroughly. Place the lid on.

4) Place the dutch oven or slow cooker insert onto the large old towel. Wrap it well with the towel to slow down heat loss. Place this where it won’t be disturbed (I put it in the oven so it’s out of the way, just don’t forget that it’s in there).

5) Ferment for 12-24 hours. If you have a lactose intolerance, 24 hours is recommended to make sure as much lactose is digested as possible.

6) Whisk well. Store for a week, then repeat the process for more yogurt!